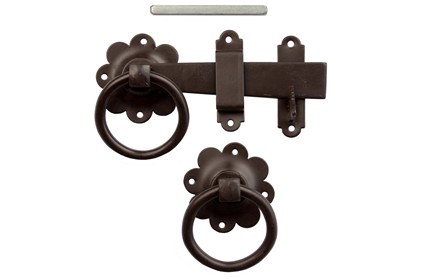
Photo Credit: http://www.qualityironmongery.co.uk/
We’re currently in the process of selling our house, and are expecting some house viewings in the next few days. To make a good first impression, we decided to make our front garden look its best, and my wife insisted that we finally change the rusty old latch on the gate. Knowing a property is secure is good for potential buyers, so we made sure we picked up an attractive iron latch that matched the rest of the gate, and I got to work fixing it in place. I’d never done much DIY before so I was surprised how quick the whole process was.
Firstly, I drilled a hole of about an inch in diameter into the gate stile away from the edge of the gate. It’s important not to let the rotating part of the latch to press against the stile of the gate, as this would mean that the ring couldn’t actually rotate.
I then cut the square rod a little longer than the thickness of the gate stile – around an inch longer – and inserted it into one of the rosettes so it could be screwed to the gate. I also made sure that the square rod sat centrally in the hole.
After that, I put the other rosette over the square rod and used a 1” #8 screw to screw it to the opposite side of the gate. It’s important at this point that you check that the rosettes align properly, because if they don’t this can hinder the way the moving rosette rotates.
The bar retainer guide should be screwed on close to the edge of the gate next. I used a 1 ½” #8 screw, and I took care to ensure that the horizontal bar was level to avoid having to make any annoying corrections involving pulling out incorrectly placed screws later. I also made sure it was sitting on the bottom of the bar retainer guide to make sure everything was properly aligned.
Finally, I used 1 ½” #8 screws again to screw the striker onto the post parallel at the same level as the bar retainer guide. After a few final checks to make sure everything looked neat and tidy, I tried it out and to my amazement, it all worked perfectly. I’d wondered if I’d be able to do it myself being a total DIY novice, but it seems as though this task was simple enough for even me to understand! Fingers crossed it gives a good first impression for our first prospective house viewers now!
Paul Robinson is new to DIY and has been enjoying getting handy around the house and garden


Speak Your Mind